Christmas Lunch 2: Winter Snowman

Monday, December 31, 2012

Christmas kids lunch
Christmas Lunch 2: Winter Snowman.  Hey readers, here is a New Year's Eve pic of the other lunch we did on Good Day Sacramento.  My daughter is out of school again this week for Christmas break, but I didn't want to leave all of you without a lunch.  We will be back next Monday with a brand new lunch which I know my daughter will be excited about, and you will be too if you are a fan of Disney Princesses!

Well, here is the recipe for this simple lunch.  Use cookie cutters or two different size cups to cut out bread in circles.  Put peanut butter on one side and jelly on the other and make two small circular sandwiches.

Use your lunchbox container and put down lettuce for the background and then use shredded cheese for snow on the ground.  After that, put your two sandwiches on top to shape the snowman.  I used dried blueberries for the buttons and eyes with raspberries for the scarf.  I cut out a little wedge of carrot for the nose.  Attach them all on with cream cheese.  Cut out some fruit leather or fruit rollup for the hat and your snowman is done!

Then, dip a little broccoli in cream cheese for some snow covered bushes and use half a mandarin orange for the sun.  Just like that you are finished!

I hope you all have a great new year and stay tuned to Lunchbox Dad for some exciting things to come in the next month or two.  Tell your friends and make sure to follow us on Pinterest and Twitter.
#lbdbento

Christmas Lunch: The Grinch

Monday, December 24, 2012

Christmas kids lunch
Christmas Lunch: The Grinch

Hey Lunchbox Dad readers, it is Christmas break so no new lunch but I thought I would go over one of the lunches I did with my daughter on Good Day Sacramento.  There is still time to make this today for your kids, even though they are out of school!

Start with your background of lettuce.  Then cut out your bread into the shape of a santa hat.  Make sure and make two pieces since it is a sandwich!  Put peanut butter on the inside and then coat the top with some sort of red jam.  Then roll up some cream cheese to put on for the brim and then a ball at the end of the hat.  Make sure and do this last or you will get red bleeding into the cream and cheese.  Next, cut out a little collar out of bread and put cream cheese on that.

For the face, cut a green apple in half and use food dye or a food dye marker to draw the face.  Go ahead and try it, don't be intimidated, its not that hard!  Cut out some cheddar cheese for the eyes and use a little red food coloring on that as well.

Put it altogether like it is shown above and finish off sprinkling craisins and yogurt covered raisins to add a little holiday cheer.  Remember to think about what your kids like and don't like to tailor the lunch for them so they will eat it!

Have a great Christmas and stay tuned because there are some really fun things in store for next month.  Also, share this blog with whoever you think might enjoy it and follow us on Pinterest and Twitter!
#lbdbento

Food Color Markers Tip

Friday, December 21, 2012


Hey Lunchbox Dad readers, I thought I would finally post that tip about the food color markers that I use.  I found these online after looking at a couple different blogs.  These seem to be the best and are Americolor Gourmet Writer Pens.  You can get them on Amazon.  These are the same ones I used on Good Day Sacramento this week to make the Grinch's face (on the apple) and the eyes (on the cheddar cheese).

I have used them a few times now (see the Tangled, Christmas Story, and Grinch lunches) and they seem to work pretty well.  They are made to decorate cakes but I have used them on bread, fruit, cheese, etc.  Harder surfaces seem to work the best though, bread is tougher for them to look good on.

Overall, I am very happy with them and find that they are a great complement to regular store bought food coloring.  If you are looking for something fast to decorate with, these will work great.  Leave comments below and let me know if there are any other products out there that you guys have used that you recommend.

My daughter is off school for the next couple Mondays, so no new lunches, but I will be posting pics of the two lunches we did on T.V.  As always, I will also posts ingredients and instructions.  Have a Merry Christmas!

Lunchbox Dad on TV this morning!

Monday, December 17, 2012

Hey everyone, I had a chance to share about my blog and my family this morning on Good Day Sacramento!  My daughter and I did two segments and it was tons of fun.  Thanks to the Alyson Schulz, Amy Carabba, and the rest of the staff for a memorable morning!  I thought I would share a few pics and links to the videos:

 Segment 1:
Winter Snowman
http://gooddaysacramento.cbslocal.com/video/8075922-the-lunchbox-dad/

Segment 2:
The Grinch Who Stole Christmas
http://gooddaysacramento.cbslocal.com/video/8076352-lunchbox-dad/

Here are some pics of our morning

Abby (my daughter), Amy (one of the hosts), and I before our segment
Abby and I in the kitchen
A shot of Abby ready to make a lunch

The main desk while we were waiting
The Good Day Sacramento Logo Lunch I made.  In case you are wondering this was just some eggs with corn starch and water mixed with red food coloring.  The letters are cut out of Provolone cheese and there is spinach in the background.  I put on some Christmas sprinkles to give it some holiday cheer.  If you heated it up, it would be like a spinach omelette!

There is no school for the next two Mondays but I hope to post some pics of the lunches we made today and also give some tips I have found for the first half year of doing lunches as lunchboxdad.  Thanks for reading and make sure to follow this blog, comment below, and follow me on Pinterest (lunchboxdad) and on Twitter (@lunchboxdad).

Reminder about tomorrow

Sunday, December 16, 2012

Remember to check us out on Good Day Sacramento tomorrow morning. We will be on in the 8 am and 9 am hours making lunches. It is on the cw 31 if you are in the area. Otherwise I will link the video to this blog as soon as I can. Because we will be doing the show tomorrow I won't be able to post a lunch but stay tuned for pics of the at the show where I will make two new lunches with my daughter!

Week 13: Gingerbread Man

Monday, December 10, 2012

Gingerbread Man bento lunch

Week 13: Gingerbread Man.  Hey readers, this week is a healthy version of a gingerbread man.  I didn't have as much time this week, after doing A Christmas Story last week and getting ready to do two lunches for the T.V. show, but here is a very simple lunch that can be easy to replicate at home.  I wanted to do one that would be quick and simple for you guys to try for your kids if you havent done one before.

The Gingerbread Man is just a PB and J sandwich on wheat bread.  I had a cookie cutter that I used on the bread to make the shape.  Instead of frosting and candy I used dried fruit and cream cheese.  The buttons are dried blueberries, the mouth is dried mango, and the eyes are dried cranberries.

The ground is made of fresh raspberries and blackberries while the background is lettuce.

The christmas tree is white cheese that I colored green using the food markers.  I also used dried cranberries as ornaments on the tree.  There is a few scraps of bread behind it to give it some depth instead of it being directly on the lettuce.

Follow me on Twitter and Pinterest and make sure to catch my daughter and I on Good Day Sacramento (CW 31) next Monday if you are in that area.  Otherwise it will be posted on their website and I will link it on the blog here.
#lbdbento

Lunchboxdad on T.V.!

Wednesday, December 5, 2012


Hey lunchboxdad.com readers.  The exciting news I told you about is official.  Good Day Sacramento is going to have my daughter and me make lunches on Monday December 17.  We will be on for two segments in the 8am and 9 am hours.  This is the local cbs/cw morning show which airs on channel 31 every day.  If you are in the northern California area check it out, otherwise the videos will be posted on their website after it airs.  Thanks to Sarah Tieszen for sending in the link for the blog in to the show!  Here is a link to their website: http://gooddaysacramento.cbslocal.com/

Week 12: A Christmas Story

Monday, December 3, 2012

Ralphie leg lamp christmas lunch
Week 12: A Christmas Story.  This lunch is such a "Pink Nightmare", or maybe its "A Major Award" for my daughter.  Well, it is a little "FRAA-GEE-LEE."  Ok, enough with the Christmas Story references.  This is my favorite Christmas movie and my daughter and I watched it last week together so I thought I would theme this week's lunch around it.

As always, let me know what you think and what you might use in this lunch for your child.  Stay tuned for the big announcement in a day or two!

Please remember to follow me on Facebook, Twitter, Pinterest, and YouTube.


Ingredients

2 fresh slices of whole wheat bread 
   Yellow, blue, and red food coloring and/or food coloring markers
1 small orange (mandarin, tangerine, etc.)
1 stick of string cheese
1/4 cup fat-free strawberry cream cheese
1 serving creamy peanut butter
5-7 raspberries (or similar berry)

2-3 leaves of iceberg lettuce

Directions
  1. Using template as a guide, cut Ralphie and the pink bunny suit out of a slice of bread.  Repeat with a second piece of bread.  Cover one slice with strawberry cream cheese.  Spread peanut butter on the other slice.  Press slices together into a sandwich with the cream cheese facing up.  Cut a round piece of string cheese small enough to fit on the face of the of the bunny suit and place it on.
  2. Mix equal parts yellow, blue, and red food coloring in a small bowl to make the color black.  Dip the end of a toothpick in the black coloring and use it to draw the details on the pink bunny suit and Ralphie’s face.
  3. Trim the remaining stick of string cheese to 1 1/2 inches long (this is the leg of the lamp).  Cut a women’s high heel show shape out of the scrap.  Stick the shoe to the bottom of the leg using a toothpick.  Cut the lampshade out of half the orange using the picture as a guide.
  4. Using either the above method, or food coloring markers, fill in the shoe and draw lines on the leg and lampshade as shown in the picture.
  5. Place lettuce leaves in the container as background.  Set in the sandwich, shaped like Ralphie, in the bunny suit.  Lay the berries along the bottom in a line.  Finally, place the string cheese and orange together, in the form of a lamp, right above the berries.
#lbdbento

Big Announcement!

Friday, November 30, 2012

Hey lunchboxdad.com readers, I have a big announcement in the works so check in over the next couple days to hear about it!  It should be lots of fun!

Week 11: A Tangled Lunch!

Monday, November 26, 2012

Rapunzel disney kids lunch

Week 11: A Tangled Lunch!  Tangled is one of my daughter's favorite movies so I thought I would give this lunch a shot.  It didn't turn out exactly as I was hoping, but I tried some new things with it.

The great thing about this lunch is you can use whatever you want under the bread to tailor it to what your child likes.  It can be PB&J, turkey and cheese, or whatever you want!

I hope to get more creative with some Christmas lunches over the next couple weeks.  I hope you all had a great Thanksgiving break.

Let me know any creative ideas for how you would do this lunch.

Ingredients
2 frozen slices of bread (sourdough or other white bread)
   Green, yellow, blue, and red food coloring or food coloring markers
1 serving angel hair pasta (cook according to directions on box)
3 Tbsp. fat-free cream cheese
1 slice of cheese

1 slice of lunch meat

Directions
  1. Cut Rapunzel’s head from the first frozen slice of bread using a sharp non-serrated knife.  Cut out the shape of the neck and shoulders from the second piece of bread.
  2. Take 2 Tbsp. of cream cheese and, using your fingers, shape it into two circles.  Press onto the head for the eyes.
  3. Mix equal parts yellow, blue, and red food coloring in a small bowl to make the color black.  Dip the end of a toothpick in the black coloring and use it to dye the edges around the white cream cheese and also to draw the inside circle of the eyes.  Use a clean toothpick and dip it in green food coloring to fill in the green part of the eyes.
  4. Using either the above method, or food coloring markers, draw the rest of the facial features and the dress details as shown in the picture.
  5. Place head and shoulder pieces in the container with your child’s favorite cheese and lunch meat hidden underneath (Try and sneak in a few vegetables as well).  Fill in the spots around the body with pasta to make it look like hair. 
  6. Mix three drops of green food coloring into 1 Tbsp. cream cheese.  Shape cream cheese into a lizard by forming head, tail, and two legs.  Gently, place the lizard onto Rapunzel’s shoulder as shown in picture.
#lbdbento

No lunch this week

Monday, November 19, 2012

Hey lunchboxdad readers, my daughter gets a full week off for Thanksgiving so there is no lunch this week, sorry.  I will try and post a review of those markers I was talking about by next Monday.  Have a great Thanksgiving either way!

Week 10: Happy Turkey Day!

Tuesday, November 13, 2012

thanksgiving kids lunch

Week 10: Happy Turkey Day!  Today's lunch was pretty fun.  It was Veteran's Day yesterday so my daughter had it off of school but she really wanted a fun lunch so I made it today.  This is the last lunch before Thanksgiving so I wanted to do a holiday themed one.  I think it turned out pretty good but I could have done way more stuff if she could actually eat that much!

The turkey is actually a sandwich.  It is whole wheat bread with cheese for the eyes, beak, and feet.  I used apple skin for the waddle by the beak.  I then made cheddar and havarti cheese feathers right behind the face.  What you cant see is that there is a piece of lunch meat (Turkey of course!) in the middle and another piece of bread for the other side.  I used cookie cutters for all of this part, it made the whole process really simple and fast to do.  The tail feathers are made out dried mango and apples.  For the apples I sliced them and then I carved out the feather design.  It turned out well and only took a minute to do, it was super easy.  Lastly I rubbed lemon juice on the apples to keep them from browning.

One tool that I found online last week was markers that you can use on food where the ink is edible.  I used it on the black of the eyes this week.  I will give a separate post this week all about them because they are so useful and work really well.  They also save a lot of time.

For the ground it is just goldfish crackers (why mess with what works?) and lettuce for the background.

Let me know your comments and any ideas you have for fun Thanksgiving lunches or meals.  Also be sure to follow me on Twitter and Pinterest!

This lunch is part of a Thanksgiving blog food link up.  Check it out to great tons of fun ideas for Thanksgiving food!
#lbdbento

Veterans Day off, see you tomorrow!

Monday, November 12, 2012

Hey lunchboxdad.com readers, my daughter has Veteran's Day off today so there is no lunch today.  However, I promised her a lunch tomorrow so I will post pics then.  Have a great holiday!

Week 9: My Little Pony: Applejack

Monday, November 5, 2012

applejack kids lunch
Week 9 lunch: My Little Pony Applejack.  For this week I wanted to get back to making characters and my daughter has been asking for this one for weeks.  It is form My Little Pony Friendship is magic which I guess is their newer line of cartoons and toys.  This one is Applejack, one of her favorites.

Anyway, I have come to appreciate food dye and toothpicks which are now an indispensable tool for these lunches.   You can do really cool things with them.  It is what I drew the lines and made the eye with.  The eye is cream cheese and then I just used a little food dye.

Let me know what you think in your comments and maybe let me know what you would have done differently to give me some ideas for the future!  Also remember to subscribe to the blog or follow me on Twitter or Pinterest!

Ingredients

   Green, yellow, blue, and red food coloring 
2 slices of cheddar cheese
2 large pieces of dried mango
1 Tbsp. fat-free cream cheese
1 small piece of whole wheat bread
1 serving of goldfish crackers
1 serving of dried cranberries

1/2 cup of spinach

Directions
  1. Using the template as a guide, cut out the shape of the pony’s head from one piece of cheese.  Cut out the shape of the body from the second piece of cheese.  Finally, use the template to cut the cowboy hat out of whole wheat bread.
  2. Take dried mango and cut the shape to be like the mane and tail.  It doesn’t have to be exact, just similar to the picture!
  3. Take 1 Tbsp. of cream cheese and, using your fingers, shape it into a circle.  Press onto the face for the eye.
  4. Mix equal parts yellow, blue, and red food coloring in a small bowl to make the color black.  Dip the end of a toothpick in the black coloring and use it to dye the edges around the white cream cheese and also to draw the inside circle of the eyes.  Use a clean toothpick and dip it in green food coloring to fill in the green part of the eye.
  5. Using the above method, draw the rest of the facial and body features as shown in the picture.  Use red for the three apples by the tail and for the hair tie on the mane.
  6. Place bed of spinach in the container.  Sprinkle the ground with goldfish and dried cranberries.  Place the body piece, followed by the head.  Lay the mane on top to cover the seam and gently lift the body to place the tail a little underneath.  Place the hat slightly behind the head.  Finish by setting the apple in the corner of the container!
#lbdbento

Week 8: Scaredy Cat and The Mummy

Monday, October 29, 2012

halloween kids lunch

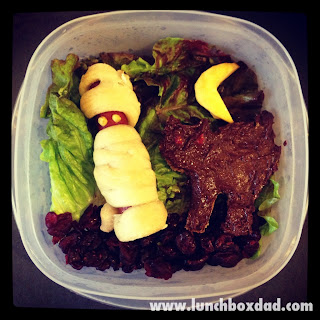
Week 8: Scaredy Cat and The Mummy.  This week I sort of ran out of time and energy, I have been working a lot, but I came up with this to finish up our Halloween themed lunch series.  Its pretty simple but hopefully she will like it.

I used the standard Romaine lettuce for the background.  It works well for Halloween because of the darker parts.  For the ground I threw in some Craisins because they are pretty healthy and my daughter loves them.  I used the apple moon again because we are almost out of apples and it works well for Halloween.

I cut the "Scaredy Cat" out of bread and used Nutella to darken it up.  For the red eyes I cut up bits of strawberry.

For the Mummy, I used a hot dog and pizza dough.  I got this idea from Family Fun magazine and have used it before.  You can use breadstick or pizza dough from the cylinder shaped can at the supermarket, roll it out, and cut it into 1 inch strips.  You then wrap it around the hot dog to look like a mummy.  Bake it in the oven at 375 for about 14 minutes.  For the eyes, I like to use mustard because it looks good and goes well with the hot dog.

Let me know what you think and be sure to follow Lunchbox Dad on Twitter and Pinterest!
#lbdbento

Halloween Themed Dinner!

Saturday, October 27, 2012

My wife and I put together a Halloween themed dinner last night so I thought I would give the readers of my Blog a bonus post for this week.  This was just a fun dinner for our family.  Many of the ideas were taken from Family Fun Magazine and were pretty easy to do.  So maybe this will inspire you with some ideas.

Ghost Potatoes.  These were slices of baked potatoes with sour cream on them and green onion faces.


Melon Brains.  This was a cantaloupe that we carved like brains.  We used a vegetable peeler on the outside and a paring knife to do the carving.


Apple Vampire Teeth.   These are apples that we cut out like lips and then inserted sliced almonds into them.  Make sure and coat with lemon juice right away to keep them from turning brown!


Spider Cupcakes.  These are cupcakes with rosting we turned gray with black food coloring.  The outside is chocolate sprinkles and licorice for the legs.  The eyes are mini oreos with chocolate chips in the middle.


Rotten Apple Punch.  This is apple cider died black with gummy worms, really simple.


Cheesy Frankenstein Fingers.  This is string cheese carved to look like fingers with brussel sprout fingernails.
#lbdbento

Bonus Post Tonight!

Friday, October 26, 2012

Hey lunchboxdad readers, check back tonight for a bonus post of our family Halloween themed dinner.  I will try and post up pics early tonight or tomorrow morning.  My wife and I have been working hard so stay tuned!

Week 7: A Nightmare Before Christmas

Monday, October 22, 2012

Halloween nightmare before christmas kids lunch
Week 7: A Nightmare Monday!  I decided to do a Nightmare Before Christmas because it is one of mine and my daughter's favorite Halloween movies and we just watched it again.  This week was pretty simple.

As always, post your comments for me and let me know the best way that you have found to hard boil eggs and peel them.  Any tips and tricks to it?  Remember to follow me on Facebook, Twitter and Pinterest.  Check out my vdeo tutorials on YouTube as well.  Have a "Nightmare" of a week!


Ingredients:

1 frozen slice of whole wheat bread 
   Yellow, blue, and red food coloring and/or food coloring markers
6 red grapes
2 hard-boiled eggs, peeled
1/2 Tbsp. fat-free strawberry cream cheese
1 serving grape jelly
1 round slice of white cheese 
2-3 leaves of romaine lettuce

1 small piece of nori (dried seaweed)

Directions
  1. Cut swirly hill out of a slice of frozen bread.  Cover swirly hill with grape jelly.
  2. Cut small slice off the back of each hard boiled egg so they will lay flat.  Trim both slices into ears for Zero the dog as shown in picture.
  3. Mix equal parts yellow, blue, and red food coloring in a small bowl to make the color black.  Dip the end of a toothpick in the black coloring and use it to draw the details on the two hard-boiled egg faces (Jack and Zero).  Place small dab of strawberry cream cheese on Zero’s face for his nose.
  4. Using small scissors, cut the nori into the shape of a small girl (Sally), similar to the one in the picture.  It doesn’t have to be exact, just do your best!
  5. Place lettuce leaves in the container as background.  Set circular slice of cheese in the middle as the moon.  Put in the swirly hill in the bottom right corner. Place the two eggs as shown.  Set the girl above the hill, as if she’s standing on it.  
  6. Lay the grapes along the bottom in a line.  If desired, cut a few of the grapes into cross shapes like tombstones.
#lbdbento

Week 6: Jack O' Lanterns

Monday, October 15, 2012

kids halloween lunch
Week 6: Jack O' Lanterns.  This weekend I was gone for work from Thursday through Sunday at midnight, so this Monday's lunch isn't as elaborate as usual.  I had to plan ahead of time and include stuff that would keep so I could just put it together Monday morning.

We have three apple trees in our backyard, so we have been drying apples.  I used these dried apples for the ground since they sort of look like dried leaves and my daughter loves them.  The background is romaine lettuce.

For the Jack O' Lantern I sort of cheated because of time.  I used a cookie cutter to cut out the shape of a pumpkin from bread, meat, and cheese.  I then put it all together to form a sandwich with the cheese on top.  I then cut the eyes, nose, and mouth out of black olives.

For the side torches I used pretzel sticks.  The fire part is made out of fruit roll up.  I cut a piece off the whole roll up then cut strips down most of one side to create the fringe.  After that I rolled it onto the pretzel stick.  It makes a good sweet and salty snack.

As always, let me know what you think and thanks for checking out my blog.  Remember to leave comments here or follow Lunchbox Dad on Twitter or Pinterest.
#lbdbento

Week 5: Spooky Graveyard

Monday, October 8, 2012

halloween spooky graveyard lunch
Week 5: Spooky Graveyard.  It's a spooky lunch Monday!  I decided to do Halloween themes this month, so this is my first attempt at not doing an actual character, but doing a scene instead.  It was fun to do and didn't take me as long as I thought it might.  Last weeks the Dora and Boots lunch fell apart on the way to school and I had to do emergency first aid when I got there.  It was probably because it was too big of a container so I went smaller with this week's spooky graveyard.  Here is the breakdown of how I did it.

It is basically a PB and J sandwich.  I used whole wheat bread for the background and covered it with grape jelly for a night sky feel.  The stars are just a couple white sprinkles.  This is going to be messy so my wife threw in some wet wipes for my daughter to clean up with.  The tree is bread with chunky peanut butter.

I used a yellow apple for the moon and green apples for the grass.  I have three apple trees in my backyard so they were easy to get.  For the fresh dirt by the grave I used a little nutella with a little bit of chocolate sprinkles on top of the apple.  The bones are cream cheese and I just formed them into that shape which was surprisingly easy to do.

The tombstone is a piece of bread with cream cheese on it.  A cool thing I found was that if you use equal parts red, blue, and yellow food coloring it will make black.  I used this to write on the tombstone and to make the skull face.  I also mixed a little black food coloring with cream cheese to make it gray.  It is hard to tell from the picture but the tombstone actually is gray.

Let me know what you think or what you might have added to enhance it.  Please remember to share on Facebook, Twitter, or Pinterest if you like it!
#lbdbento

Week 4: Dora and Boots

Monday, October 1, 2012

dora the explorer kids lunch
Week 4: Dora and Boots.  Mondays are for exploring!  My daughter is in a spanish immersion class at her school, plus she loves Dora the Explorer.  So I thought I should do Dora and Boots this week.  Don't ask me how long it took, it was definitely the most labor intensive lunch so far.  This was mostly because I needed to find a container to make it look nice and to fit Dora's big hair.  That hair was hard to cut out.  Her hair is made out of Nori.  It just works really well when you need black areas in different shapes.  I use scissors instead of a knife to cut it.  Anyway, here is what goes into this lunch.

Let me know what you think, or if you have any ideas that I could have used to make it better!  I appreciate any comments you might have.  Remember to follow me on Facebook, Twitter, Pinterest, and YouTube!

Ingredients

2 slices whole wheat bread
1 serving peanut butter and jelly
1 Tbsp. low-fat strawberry cream cheese
1 Tbsp. fat-free cream cheese
2 mandarin oranges
1 grape tomato
1 sheet nori (dried seaweed)
1 cup of fresh spinach
1 piece of red licorice
   Blue and black food coloring

3 blue corn tortilla chips

Directions
  1. Cut both pieces of bread in a circle shape for Dora’s head.  Spread peanut butter and jelly on the pieces.  Press pieces together to make a sandwich.  Use template to cut Dora’s hair out of nori.
  2. Place two oval spots of cream cheese on the bread for the eyes.  Mix equal parts red, yellow, and blue food coloring to make black.  Use a toothpick to apply the black food coloring to create the details on Dora’s face as shown in the picture.
  3. Break blue corn tortilla chips into the head, body, arms, and tail for Boots.  Spread strawberry cream cheese on head piece for his face and ears.  Put two dots of white cream cheese on his face for eyes.  Use toothpick to put one dot of blue food coloring on each eye and black food coloring for his nose and mouth as shown in picture.  
  4. Spread spinach as background in your container.  Place Dora’s head piece on the left of the container.  Place hair on top of her head.  
  5. Arrange Boots’ body pieces to the right of your container, as shown in picture.  Slice grape tomato in half and put on stomach.  Use two small pieces of licorice for each boot and place under his body.
  6. Finish by peeling oranges and dividing them into sections.  Make a border around the container with orange sections.
#lbdbento

Purple foods

Thursday, September 27, 2012

I am thinking out the lunch for Monday and am wondering about some ideas for purple colored foods. These can be breads, fruits, condiments, anything that might be useful that a kindergartner might eat.  Comment below and let me have those ideas!

Follow me on Pinterest and Twitter, click on these links

Monday, September 24, 2012

Im on Pinterest and Twitter now so you can follow me on those sites

Follow Me on Pinterest

Week 3: Kung Fu Panda

kung fu panda easy kids lunch


Week 3: Kung Fu Panda.  Are you ready for a Kung Fu lunch?  I hope my daughter is!  This was a fun one to make.  It turned out a little bit angrier and less cartoonish than I was originally planning but I think it is alright.  Besides my daughter loving Kung Fu Panda this was in response to my friend Helen (who's the biggest Panda fan I know) who beat me at fantasy football last week.  Humble pie does not taste good.

Anyway, I put less stuff in this week because my wife bought new sandwich containers for our daughter's lunch so it is more shallow.  Tell me what you think.  Have any ideas you would use to make it better or advance the theme even more?  Remember to follow me on Facebook, Pinterest, and Twitter.
Ingredients

Peanut butter and jelly
2 pieces of sourdough bread
   Blue food coloring
1 Tbsp. fat-free cream cheese
8-10 blueberries
8-10 green peas
1 Tbsp. of Nutella spread
1 serving pasta, cooked
3 potstickers, cooked

1 piece of nori (dried seaweed)

Directions
  1. Using the template as a guide, cut out the shape of Kung Fu Panda’s head from both pieces of bread.  Spread peanut butter on one piece and jelly on the other.  You could also use your child’s other favorite sandwich ingredients.  Press the pieces together in a sandwich.
  2. Cut two teardrop shaped eye pieces and two small ear pieces out of nori.  Cut the nose out.  It doesn’t have to be exact, just similar to the picture!  Attach nori pieces to sandwich with a little peanut butter.
  3. Take 1 Tbsp. of cream cheese and, using your fingers, shape it into two small circles.  Press onto the nori eye pieces that are already on the sandwich.
  4. Put three drops of blue food coloring in a bowl.  Dip the end of a toothpick in the food coloring.  Use it to create the blue part of the eye by lightly touching the tip of the toothpick to the cream cheese on both eyes.
  5. Use a toothpick to draw lines with Nutella spread where shown on picture to form eyebrow, nose, mouth, and chin.
  6. Place sandwich in container.  Put cooked potstickers underneath as shown, and fill in empty spots of container with cooked pasta, blueberries, and peas.
  7. If desired, finish by cutting the words “KUNG FU PANDA” out of nori and use a drop of water on each letter to attach them to the potstickers.
#lbdbento

Getting Ready For Monday

Friday, September 21, 2012

I'm getting the lunch ready for Monday.  Anyone have good ideas on how to cut Nori (dried seaweed) easily?  I have tried using a sharp knife and it works ok but I would love some suggestions.  Go ahead and post away!

Blog is back up!!

Tuesday, September 18, 2012

Ok lunchbox dad is back up and I've been assured that the problem is fixed.  Subscribe to my feed and help me out on my quest to make every Monday lunch special for my daughter!

Week 2: Cat in the Hat

Monday, September 17, 2012

dr seuss cat in the hat kids lunch
Week 2: Cat in the Hat.  My blog has been down but hopefully this posts. I tried cat in the hat this week and it was a bit more difficult. I tried to sort of paint the face on with Jif's version of Nutella. It turned out alright but it was a hard one to do detail with. I have an idea of a different technique for next week that I will try since I might need to use black again.

Thanks for starting the school year with me and following me on this project.  Remember to check out my Facebook, Twitter, and Pinterest!


Ingredients

2 frozen slices of sourdough bread
   Yellow, blue, and red food coloring 
1 stick of string cheese
4 strawberries
1 serving pretzels
1 handful of grapes
1 serving peanut butter
1 Tbsp. fat-free cream cheese

1 Tbsp. strawberry jam

Directions
  1. Using the template as a guide, cut The Cat in the Hat’s head out of the slices of bread.  Repeat with his hat on one piece of bread.  Spread peanut butter on one slice of the head and press both pieces together to make a sandwich.
  2. Make alternating lines of jam and cream cheese on the hat piece as shown in the picture.
  3. Mix equal parts yellow, blue, and red food coloring in a small bowl to make the color black.  Dip the end of a toothpick in the black coloring and use it to draw the details on the Cat in the Hat’s face.
  4. Place head in container and put hat piece directly above head.
  5. Put strips of string cheese on the left of the cat.  Place three strawberries on top of the cheese.  Arrange grapes and pretzels to the right of the cat as shown in the picture.
  6. Slice a strawberry into three pieces.  Finish by placing strawberry pieces in a bow tie shape on the cat’s neck, as shown in the picture.
#lbdbento

Healthy White Bread?

Tuesday, September 11, 2012

I know I just started this blog, but if anyone sees this, I am thinking out the lunch for next week and the week after.  I find it helpful for me to look at buying things from the grocery store that can be used for multiple lunches.  White bread is going to have to be used a couple times coming up.  I obviously want the lunches to be as healthy as possible.  Can anyone tell me a healthy option for white bread?  Please post it on here if you know of one.  Keep tuned for week 2 coming soon!

Week 1: Hello Kitty

Monday, September 10, 2012

Hello Kitty easy kids lunch

Week 1: Here we go, my first official project, Hello Kitty, one of my daughter's favorites.  

Hello Kitty is pretty popular in my house.  My daughter loves her and many of the kids in her class do as well.  I can't believe she is still around, I remember the cartoon from when I was a kid.  Have fun with this and if Hello Kitty is a favorite of your child, give this lunch a shot!  Remember to follow me on Facebook, Twitter, Pinterest, and YouTube.

Ingredients

2 slices frozen sourdough bread
6 black tortilla strips
2 Tbsp. low-fat strawberry 
   cream cheese
1 handful of dried cranberries
1 serving peanut butter and jelly
3 strawberries
1 white “button” candy
1 handful goldfish crackers
1/2 cup fresh spinach

3 baby carrots

Directions
  1. Using the template as guide, cut Hello Kitty’s head out of 2 frozen slices of bread.  Spread peanut butter and jelly on the slices and press together in a sandwich.  If your child doesn’t like pb&j, use the ingredients they prefer.
  2. Form strawberry cream cheese into a bow shape and place on head by the ear, as shown in the picture.  Place white candy piece on top.  Use the cream cheese to make a small spot for the nose.  Press dried cranberries on the head for her eyes. 
  3. Use spinach as a background to cover the bottom of your container.  Place Hello Kitty head in the middle inside of container.   
  4. Arrange goldfish crackers on one side and dried cranberries on the other.  Fill in the top with strawberries.  Place three baby carrots on the bottom to fill up empty spots.
  5. Finish by pressing black tortilla strips onto the sides of Hello Kitty’s face for whiskers.  Use 3 on each side.
#lbdbento
I'm just a Dad who was inspired by a fellow parent and blogger to create a special lunch every Monday for my daughter during her first year of Kindergarten.  The goal is for the lunch to be made out of common stuff from the fridge, be semi-healthy, and of course help her to feel feel special every Monday as she starts a new week at school!
 
site design by Design Chicky (© copyright 2015)